In
the hobby scene, Software Defined Radios (SDR's) are often discussed
and it is mostly about the possibilities that the software offers.
Due to all the hype surrounding the software and the craving for new
functions, important factors are pushed into the background. The
preselection of the antenna signal is one such factor.
The radio market is flooded with cheap SDRs that promise incredible
possibilities. Some of these devices do indeed receive quite well,
but practically all of them lack sufficient preselection. Some SWLs
or even radio amateurs do not realize how important this is. Good
SDRs such as Airspy HF+ Discovery and SDRplay devices can benefit
very well from a preselector. Older, analog receivers such as the
Kenwood R-1000, Lowe HF-150, Alinco DX-R8, AOR AR3030 etc., which
are still frequently encountered, do not have a proper preselector
built in. These overload quite quickly on broadband antennas.
But what is a preselector and how does it affect reception?
A preselector is a device that is inserted between the antenna and
the receiver. This preselector contains various filter combinations.
These are low-pass and band-pass filters. Sometimes an amplifier is
also built in to compensate for the cable and/or filter attenuation.
An attenuator may also be built in. The frequencies only pass
through the appropriate low-pass or band-pass filter. This filter is
either switched manually by the user or automatically by any
receiver control system. In this way, only a small part of the
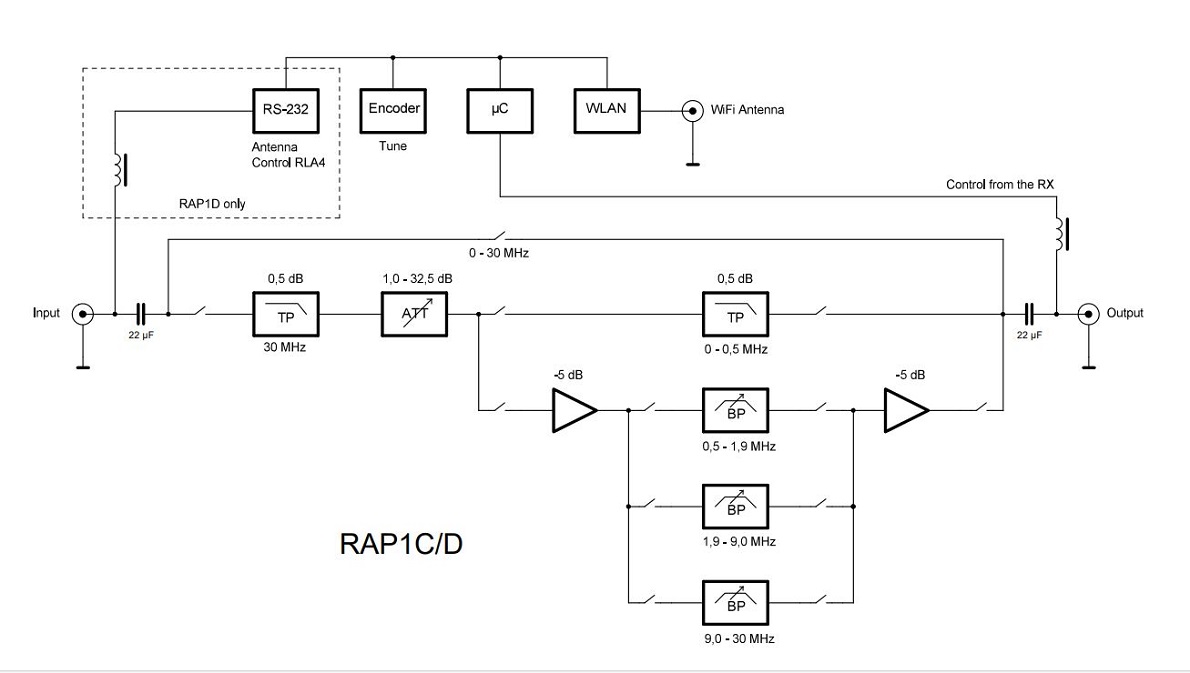
frequency spectrum is allowed through to the receiver. See block
diagram below. A preselector only suppresses out-of-band
interference, signals that occur outside the filter passband.
A broadband antenna, as is often used today, generally receives the
entire frequency spectrum. There are countless and sometimes very
strong stations in this frequency spectrum. If this broadband signal
reaches the analog/digital converter (ADC) of an SDR without
sufficient pre-selection, it will quickly overload. The result is
then strong noise, undefinable signal mixtures and ghost stations
produced by the SDR itself (or also by an analog receiver). This
type of interference is also known as intermodulation or large
signal interference. You can find out what such overmodulation can
sound like by clicking on the following link.
>Large
signal interference<
A preselector is used to ensure that such undesirable phenomena do
not occur at all or are greatly attenuated. This is where the RAP1D
comes into play. This was specially developed for broadband
receivers (SDR), but can also be used for analog receivers.
Broadband because every SDR provides a certain spectrum bandwidth.
The RAP1D has three tunable bandpass filters that become broader as
the frequency increases.
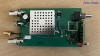
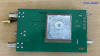
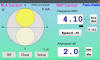
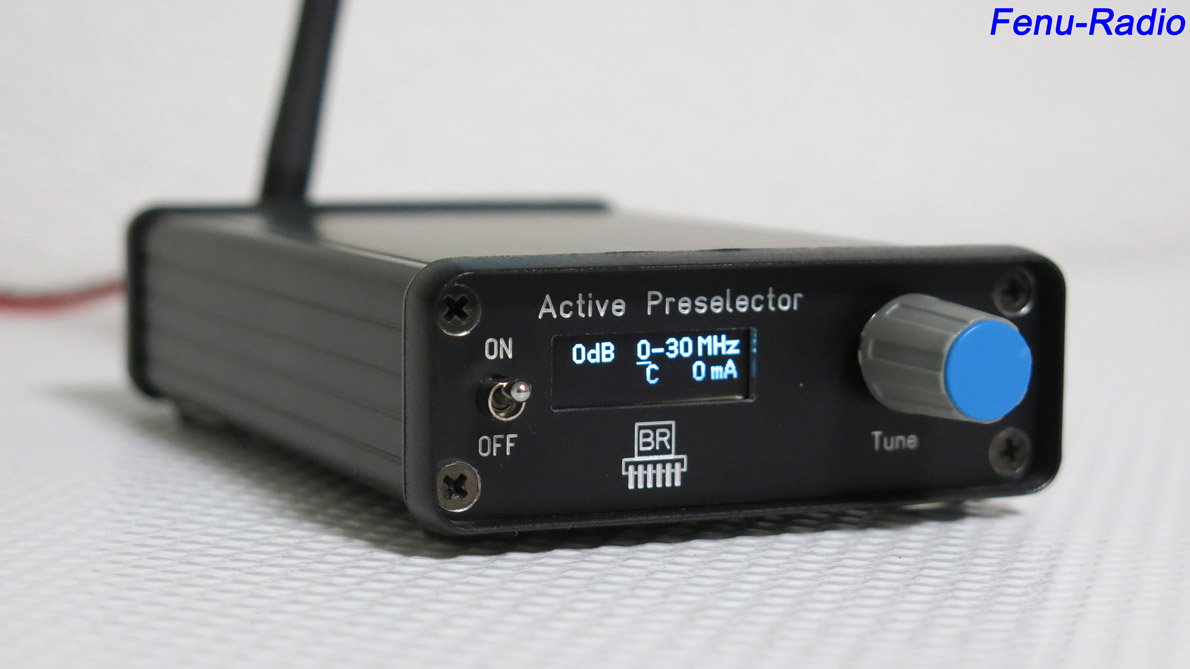
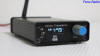
The RAP1D has an aluminum housing and, as you would expect from
Reuter Elektronik, has a high-quality finish. The OLED display is
correspondingly small, but easy to read. The inscriptions are
engraved.
.
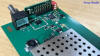
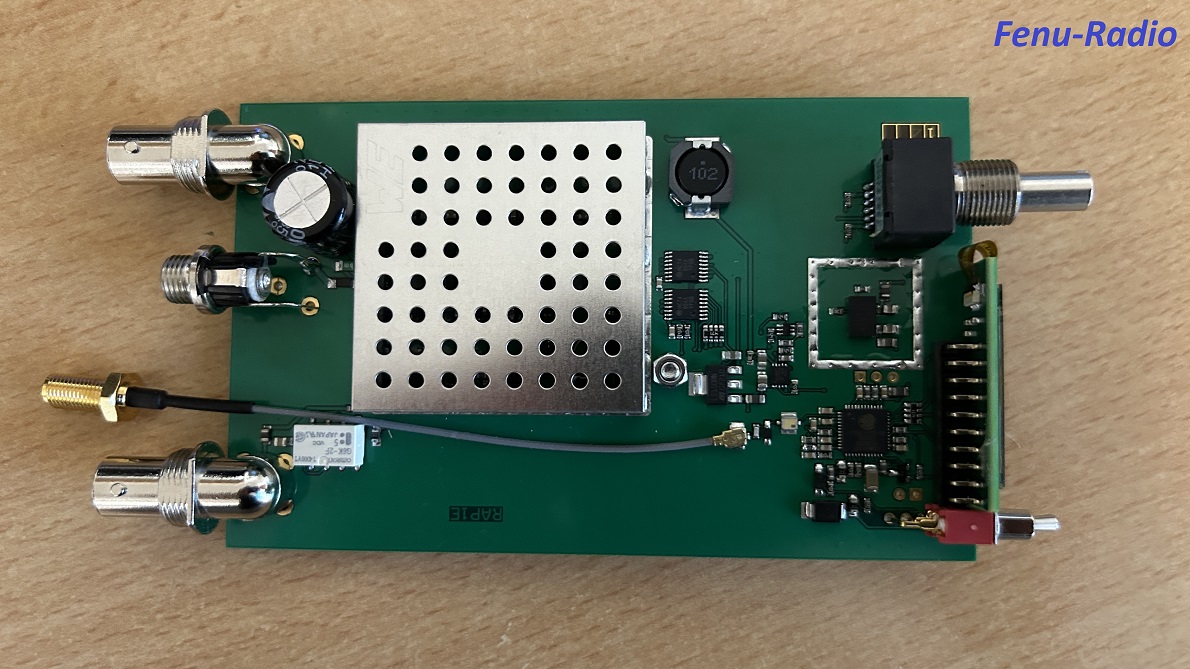
The
actual filter circuit is located under a shielded housing and is
therefore double shielded. A pleasant discovery under the hood is
the high-quality optical encoder from Bourns. A guarantee for a long
service life! Mechanical encoders, which are often installed in
similar devices, show signs of wear after a short period of
operation and no longer function properly. Due to its small size,
the RAP1D is a lightweight. For this reason, an additional weight is
screwed onto the underside of the circuit board. This gives the
device more stability on the table.
.
The most important
data of the RAP1D
-- Size (W x H x D): 75 mm x 28 mm x 130 mm
-- Frequency range: 0 - 30 MHz
-- Low pass filter at 0.5MHz & 30MHz
-- Three tunable bandpass filters 0.5 - 1.9MHz -- 1.9 - 9MHz
-- 9 - 30MHz
-- Adjustable attenuator 1 - 32.5dB
-- 0 - 30MHz filter bypass circuit
-- Filter bandwidth 15 - 20% of the set center frequency
-- Pass attenuation: -2 dB from 0 - 0.5 MHz -- 0 dB from 0.5
MHz - 30 MHz
-- Total gain up to 10 dB
-- Level accuracy: ± 3 dB
-- IP3: >= + 20 dBm (10 MHz)
>= + 25 dBm
(10 MHz) from serial number 521
-- Intrinsic noise: -159 dBm/Hz at 10 MHz
-- Power supply: 9 to 15V / max. 250 mA
-- Connections:
Antenna & RX: BNC
Power supply: Hollow socket with 5.5 x 2.1mm
WLAN antenna connection: SMA
-- Preselector control:
Manually on the device using the tuning knob
via WLAN from the PC & all Reuter RDRxx receivers
via the coaxial cable. Only possible with a Reuter RDRxx
receiver.
-- Version "D": Built-in remote power supply with 12V, 200mA
max.
-- Version "D": Built-in antenna control for the Reuter RLA4
antenna.
-- Weight: <= 500 g
-- Can be used with any receiver
Scope of delivery:
-- RAP1D
-- WLAN antenna
RAP1D - Blockdiagram
Preparations
for operation
The first thing you should do is read the
operating instructions. As small as
the RAP1D may seem, it has a number of functions that need to be
mastered. You will soon notice that the RAP1D does not come with a
DC cable. Why Reuter Elektronik does not include the essential power
cable is a mystery to me. You need a power cable with a 5.5x2.1mm
barrel connector. Today's SDRs very often have an "SMA" antenna
connection. At best you need a pigtail cable SMA to BNC connection.
There are also adapters, but I do not recommend them.
Once all the connections have been made, you are ready to go! When
the RAP1D is switched on, the serial number is displayed first. This
is important for configuring the WLAN. But as a first step, I
operate the preselector manually with the tuning knob. This button
has several functions. The small cursor bar below the displays is
moved by pressing and simultaneously turning it.
The following settings can be made with it:
-- Change filter frequency in 1MHz, 100KHz, 10Khz steps
-- Adjust gain/attenuation
-- Antenna control of the RLA4
-- Display brightness
-- Configuration WLAN connection (press and hold button, switch on
device)
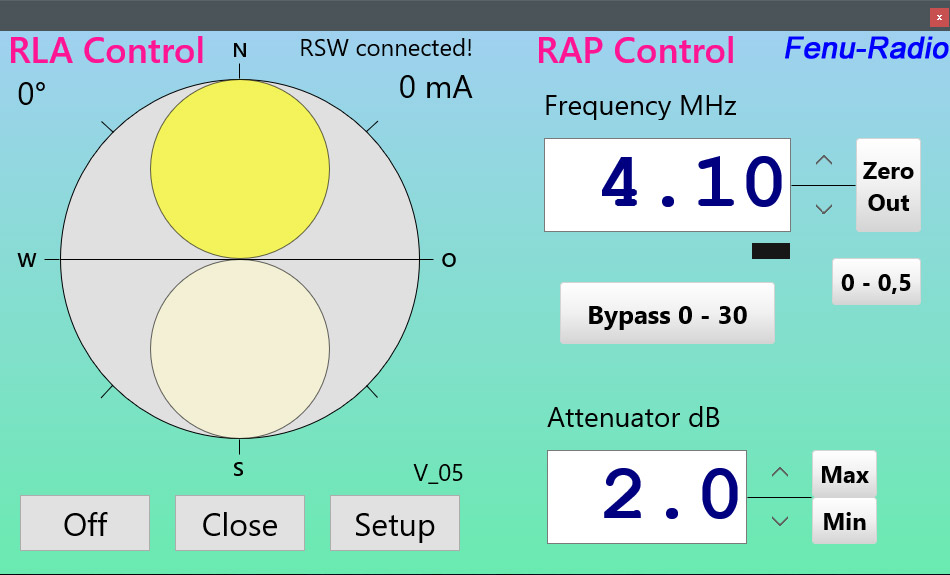
The control software RAP Control /
RLA Control
In order for the RAP1D to communicate with the control software, it
must first be connected to the WLAN network. Press the WPS button on
the router. Press and hold the tuning button on the RAP1D and switch
it on. After about 5 seconds, press the button again briefly and
turn the button slightly so that the RAP1D enters WLAN scan mode.
After a few seconds, all available access points are displayed.
Select yours and press the button to confirm. An "L" should then
appear on the display to indicate successful login to the AP. If the
control software has access to the RAP1D, an "S" will appear.
The control software for the RAP1D comes as an .exe file and does
not need to be installed. To establish the connection, go to Setup,
enter the serial number of the RAP1D and click on "Connect". The
connection is established immediately. The control software is
uncomplicated and easy to use. However, the program window is too
large! It takes up a lot of space on the monitor. If you only have
one monitor, it will be cramped if you are operating an SDR. What
the program lacks is an "On Top" function. This keeps the program
window always in the foreground.
Firmware updates can still be transferred to the RAP1D via the setup
window. This can now be done quickly and without any problems.
.
Function of the
preselector
The video below shows how the RAP1D works. It is controlled remotely
via the PC. The supplied remote control software "RAP Control / RLA
Control" is used for this purpose. I have used the Premium SDR Elad
FDM-S3 for this. This is capable of displaying 24MHz spectrum
bandwidth.
The first operating mode of the RAP1D is the bypass function. This
bridges the bandpasses, which means that the input signal is not
filtered. You can then see how the filtered frequency section moves
from left to right. The clicks on the up/down buttons of the control
software are clearly visible. It is easy to see how the width of the
filter passband increases towards higher frequencies. The filter
bandwidth is 15 - 20% of the set center frequency. Let's take 10MHz
center frequency as an example. 20% of this results in 2MHz. This
means that the filter passband width is max. 2MHz.
Working with the
RAP1D
I have been using the RAP1D since July 2023 and was also a beta
tester. During the test phase, several firmware updates were made.
These mostly concerned the control system and the optimization of
the WLAN function. But also the hardware. This was updated from
version C to D.
The RAP1D was mostly operated with the RDR52 because this receiver
can control the RAP1D remotely. The nice thing about this is that
the two devices communicate bidirectionally via the WLAN connection.
The RDR52 can completely remote control the preselector and the
antenna control in the RAP1D. All settings can be made on the RDR52.
The RAP1D does not need to be operated separately. Unfortunately,
the antenna control could not be tested because I do not have an
RLA4 antenna. I still have the older RLA3, but unfortunately this
version cannot be controlled remotely. But I
was able to use the remote power supply switchable to 12V. Turn the
antenna control to over 180° and 12V is already available with max.
200mA.
The connection between the RDR52 and RAP1D is established without
any problems. In the setup menu of the RDR52, select "RSW" from the
selection list, enter the serial number of the RAD1D and activate
the WLAN access point. The WLAN search is activated on the RAP1D,
then select the RDR52 and the bidirectional connection is
established. If the frequency is changed on the RDR52, the frequency
display and the preselector in the RAP1D run synchronously. The WLAN
connection establishment when restarting the devices takes approx.
15 seconds.
The other way to remotely control the RAP1D via the RDR52 is to
connect it via the antenna cable. Yes, the coaxial cable between the
RAP1D and the RDR52 serves as a control line. For this purpose, only
"RAP" is selected in the setup menu of the RDR52. However, this type
of remote control has the following disadvantages.
-- Slow data transmission
-- Does not function bidirectionally. Data transmission only in the
direction of the RAP1D
-- Minor HF interference due to data transmission
The practice
If you work with the RDR52 and the RAP1D next to it follows every
frequency change, you will not notice the filter function of the
device. If you switch the RAP1D to bypass, the attentive SWL will
notice the subtle difference. The RDR52 itself has a simple
preselector built in and tolerates high-level antennas well to very
well. The additional filtering of the RAP1D reduces the noise floor
by a further 3-4dB, depending on the frequency range. For hardcore
DX, this is a decisive value that can make the difference between
hearing and not hearing. These differences can usually be seen with
high-level antennas such as the NTi MegaDipol MD300DX.
I had the following reception situations in the 49m & 22m band.
Myanmar on 5985KHz in the late evening was just above the background
noise without RAP1D. After switching on the preselector, the station
was intelligible and reportable above the noise. A clear SNR
increase.
Hong Kong Volmet in USB on 13282KHz at midday on the grass with an
unintelligible signal. After switching on the RAP1D, the transmitter
was clear over the grass and partly intelligible. These are just two
examples of many from the long test phase and show for which type of
SWL such a device can be of use.
The filter effect of
the RAP1D demonstrated on the JRC NRD-525
It was not easy to demonstrate the filter effect on the existing
receivers. This is because all the receivers in my shack are quite
large-signal-proof on the current active antennas. So I had to come
up with a little trick. The JRC NRD-525 turned out to be a suitable
candidate. Why the NRD-525? It's pretty resistant to large signals!
But only when the internal preselector is active. This can be
bypassed with the key combination "Memo & the number 4" and switched
to bypass. Normally, this measure should be sufficient to overload
the NRD-525. Unfortunately, however, the sum signals on the
shortwave have recently been low to very low. This was not enough to
overdrive the NRD-525.
We had to get a receiver amplifier with real power. Fortunately,
Heinz Stampfl (HB9KOC) had such an amplifier with 34dB gain in his
laboratory. This amplifier was looped into the coax line between the
RAP1D and the NRD-525.
Procedure:
The RAP1D is switched to bypass, as indicated by the dashed line on
the RAP1D display. The 34dB amplifier is switched on and the
internal preselector of the NRD-525 is switched to bypass. Then
search for a strong station.
Example 1:
The religious station Evangelische Missionsgemeinden from Nauen is
transmitting on 6055KHz and is just under S9+50dB. I then searched
for this station on other frequency ranges and found it on twice the
frequency. The station could be heard on 12110KHz. This is 2nd order
intermodulation.
By switching on the preselection on the RAP1D, the unwanted signal
could be removed immediately. To rule out the possibility that the
RAP1D or the 34dB amplifier was producing the intermodulation itself,
the preselector of the NRD-525 was switched on briefly. If the
intermodulation was still present, either the RAP1D or the 34dB
amplifier would produce the IM. However, the intermodulation
disappeared immediately. This showed that the NRD-525 had indeed
overload.
Example 2:
An RTTY signal can be heard on the 8900KHz frequency. I was able to
identify the transmitter DDH9 as DWD (German Weather Service). A
clear intermodulation. When the preselection of the RAP1D was
switched on, the RTTY signal disappeared immediately. Here, too, I
did a cross-check to make sure that the NRD-525 was really overload
and not the RAP1D or the 34dB amplifier.
Conclusion
From Burkhard Reuter's receiver forge comes another innovative
device that is unique in this form! A manual/automatic preselector
with antenna control, remote feed switch and remote control via
WLAN. It can also be used universally and has the usual high quality
of workmanship. The technical data is also impressive.
Nevertheless, there are points of criticism!
No power cable is included in the scope of delivery. The program
window of the control software is far too large and takes up a lot
of space on the desktop. One or two details could be improved, such
as an "On Top" function.
Who is the RAP1D suitable for? In my opinion, the RAP1D is a very
useful accessory for hardcore DXers. Anyone who wants to get the
last dB of SNR out of their receiver should consider this
preselector!

.jpg)
.jpg)
.jpg)